Einstein Analytics Translator
In this post I’ll share with you how you can use a CSV file, like the one in the screenshot below, to easily translate Einstein Analytics dashboards.
Single Dashboard in Multiple Languages
We know that users will often prefer to interact with an application in their language, that is a no brainer. However, this seems especially important when it comes to dashboards, as they are often presented to “important people” within a particular organization.
Einstein Analytics dashboards, although very powerful, do not provide an out of the box way to translate the dashboards dynamically - this is a feature gap that we have to find a solution for. The end goal is to have a single dashboard that will dynamically display in different languages, depending on the language setting of the user viewing it.
All you need is a CSV file
To solve the issue with translations I had built an app that takes a CSV file and outputs a JSON code that can be inserted into Einstein Analytics dashboards. Once the code is inserted into a dashboard, all that is left to do is to bind the labels properly. Sounds simple enough, but it will take some explaining on how to use it properly, so brace yourselves.
How to use the Einstein Analytics Translator app
1. Preparing the CSV file
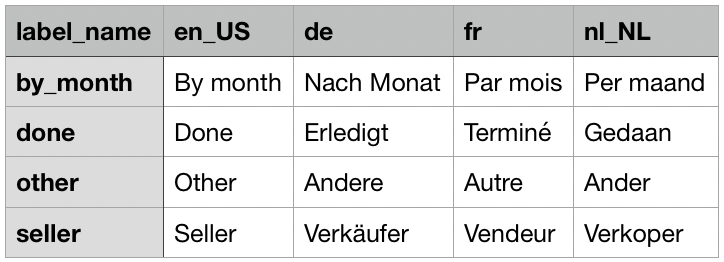
To get started I provided a sample CSV file that you can use as a template. The structure of the CSV file is very simple - the first column is called label_name, this column needs to have a unique name for each label (or phrase) that you want to translate. All the other columns represent the actual translations for that label. You can specify as many translations as you’d like, as long as each translation has its column. The column headers should contain the correct language codes supported by Salesforce.
2. Generating the JSON code
Once you have the CSV file ready - for now you can use the sample I provided - go ahead and open the Einstein Analytics Translator app and give it a second (or 30) as it’s a free Heroku app that sometimes goes dormant and needs time waking up - I’m cheap, I know…
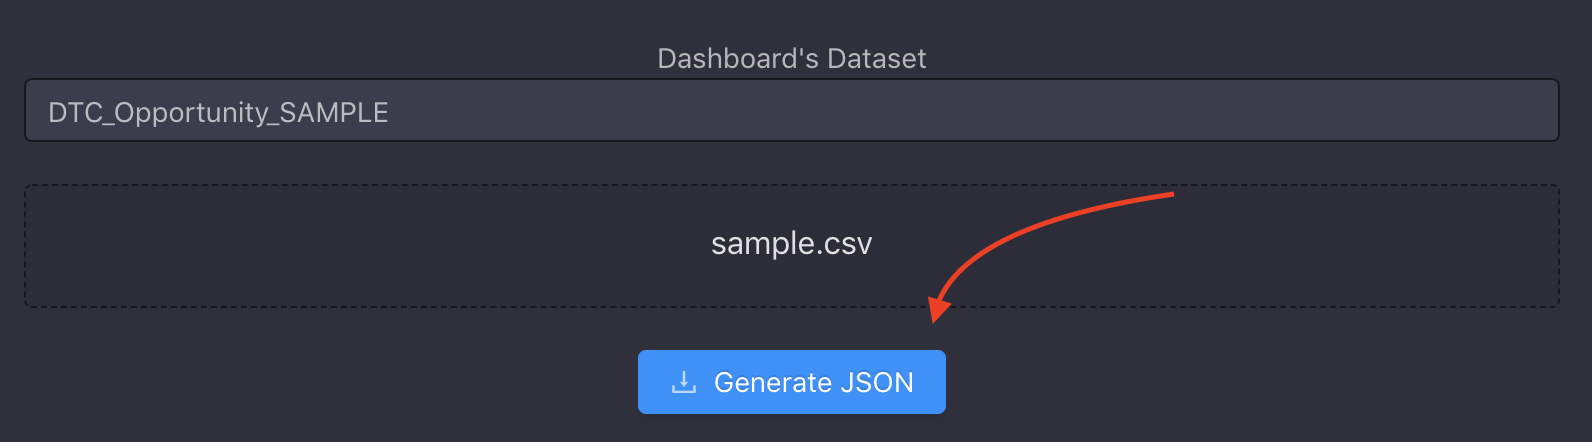
Once the application loads up, click on the Start button to go to the 2nd step. In this step, you need to upload your CSV file and provide a Dataset name that will be the driver for the code that is going to be generated. This Dataset should ideally be the one that will always have at least 1 record in it, as the code needs at least 1 record to get executed.
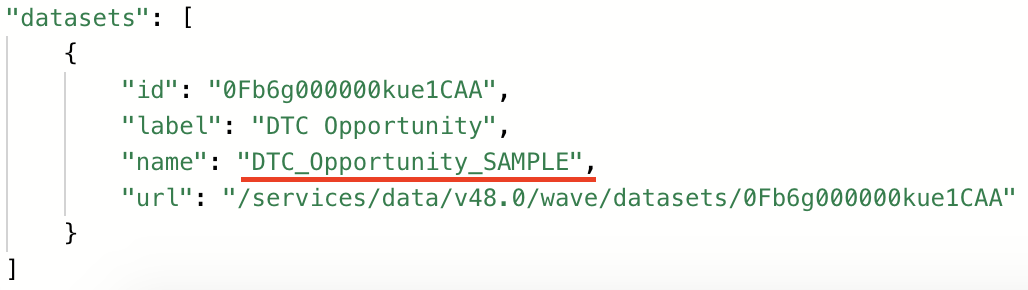
For example, let’s say that you signed up for a free Salesforce Developer Org with Einstein Analytics enabled, and you opened a dashboard called Opportunity Details. To find the name of a Dataset used in this dashboard press Ctrl + E (on macOS: Cmd + E) keyboard shortcut to open the JSON Editor. Once you are in JSON Editor, scroll to the bottom of the JSON code to the datasets section and there you will find the Dataset name - you can enter this name in EA Translator App.
Once you entered the Dataset name and uploaded the CSV file to the app, press the Generate JSON button to go to the next step.
3. Generated code
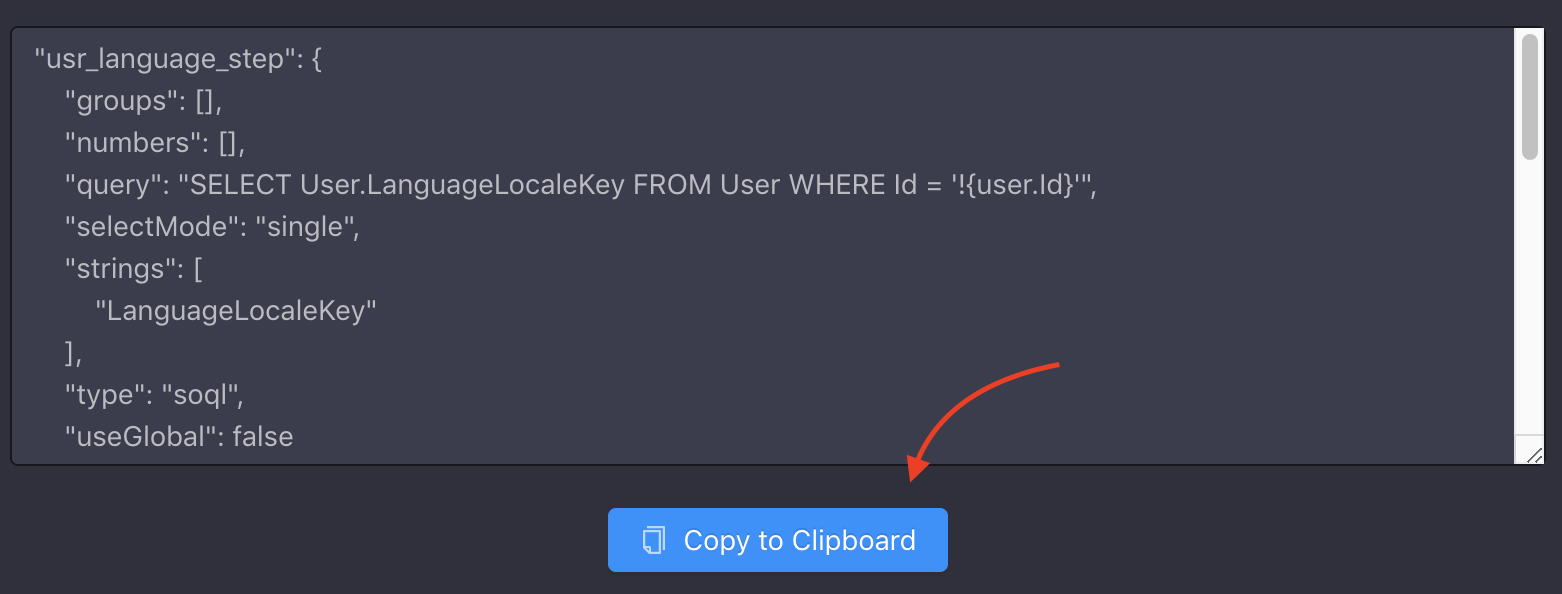
In the 3rd step of the application, you will be presented with the generated JSON code. There’s nothing much to do here except to click the Copy to Clipboard button.
The 4th step of the application will just give you an overview of what you should do with the generated JSON code and will then point you back to this blog post.
4. Using the generated code
Now is the time to use the generated JSON code inside a dashboard. Let’s go back to the example dashboard Opportunity Details that is available in the org when you sign up for a free Salesforce Developer Org with Einstein Analytics enabled.
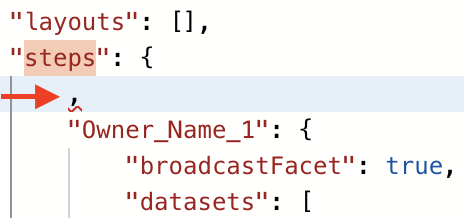
Once you open the dashboard, press the Ctrl + E (on macOS: Cmd + E) keyboard shortcut to open the JSON Editor - needless to say, make a backup at this point if you are doing this with a real-life dashboard. Find the steps part within the dashboard’s JSON file, and add a new line within its curly brackets and a comma. Paste the generated JSON code right in front of that comma, as indicated in the screenshot below. Press Done in JSON Editor to make sure that the dashboard code is still valid.
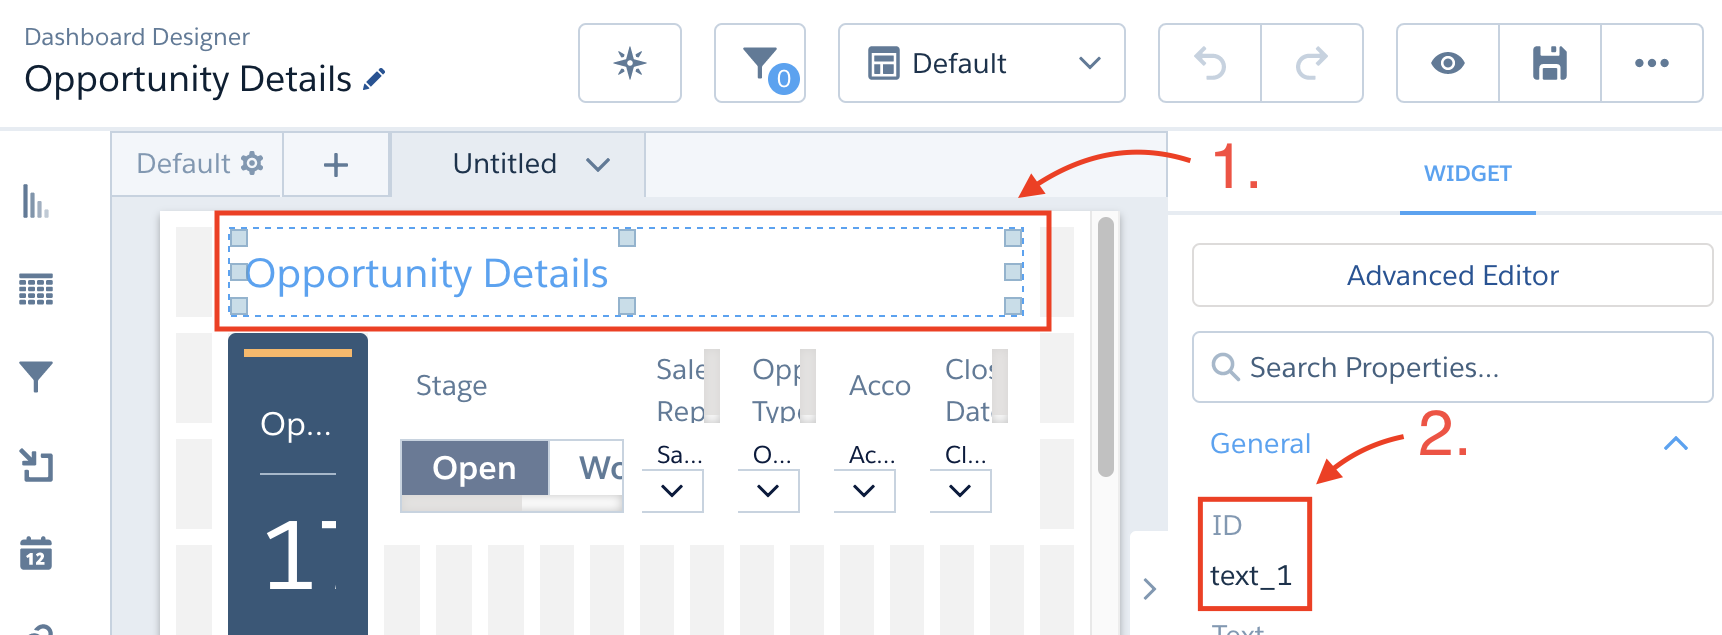
If you were able to press Done without receiving any errors, you are ready to start binding the labels to translations. While still being in the preview mode, click on one of the text widgets within the dashboard and find its ID - e.g. click on “Opportunity Details” title as indicated in the screenshot.
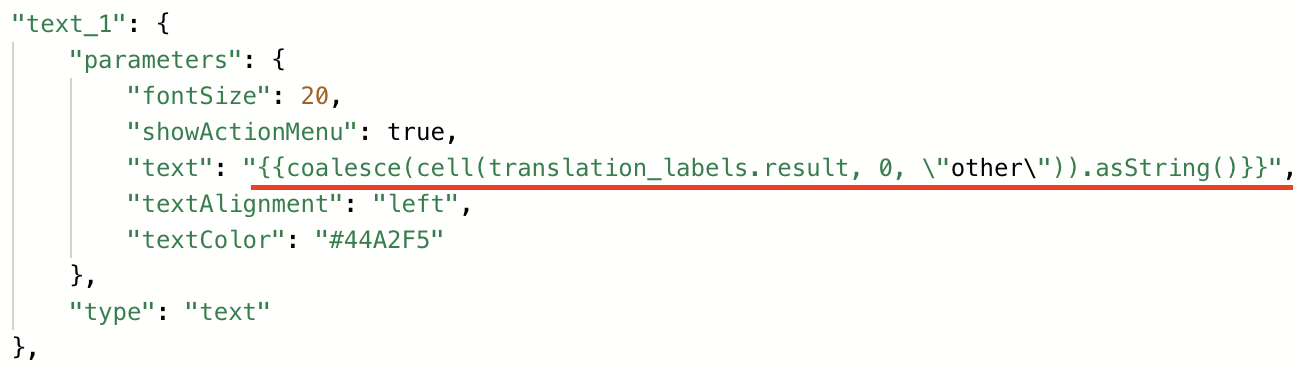
Now again press the Ctrl + E (on macOS: Cmd + E) keyboard shortcut to open the JSON Editor. Search for the text widget ID from the previous step (e.g. “text_1”) within the JSON code and bind the text value to one of the labels from your CSV file (e.g. “other”).
Now when you press the Done button the text widget that previously said “Opportunity Details” should say “Other” - as that’s the label from our CSV file we binded to. If you go to Settings > Language & Time Zone and change your User’s Language to “Deutsch”, once you refresh the dashboard the “Other” text should be translated into German “Andere”.
You can use the same binding technique and the code template below to apply bindings to text widgets and buttons throughout the dashboard - make sure to replace the “INSERT_LABEL_HERE” with the appropriate label name from the CSV file:
{{coalesce(cell(translation_labels.result, 0, "INSERT_LABEL_HERE")).asString()}}
Final words
The steps can be tricky to follow at first, but once you do it the first time it is very easy to repeat and enhance the translations. If you need to add more labels to the CSV file, the process is the same, just regenerated the new JSON code using the translator app and replace the old one in the dashboard.
The deployment with this approach is super easy as the bindings and the generated JSON code are part of the dashboard itself, so once you deploy the dashboard (e.g. using Change Set) the translations will be deployed as well.
If some parts of the process are shady, feel free to leave a comment below.